BUTTPAD ADJUSTMENT UPGRADE KIT
V1.0 March 2022
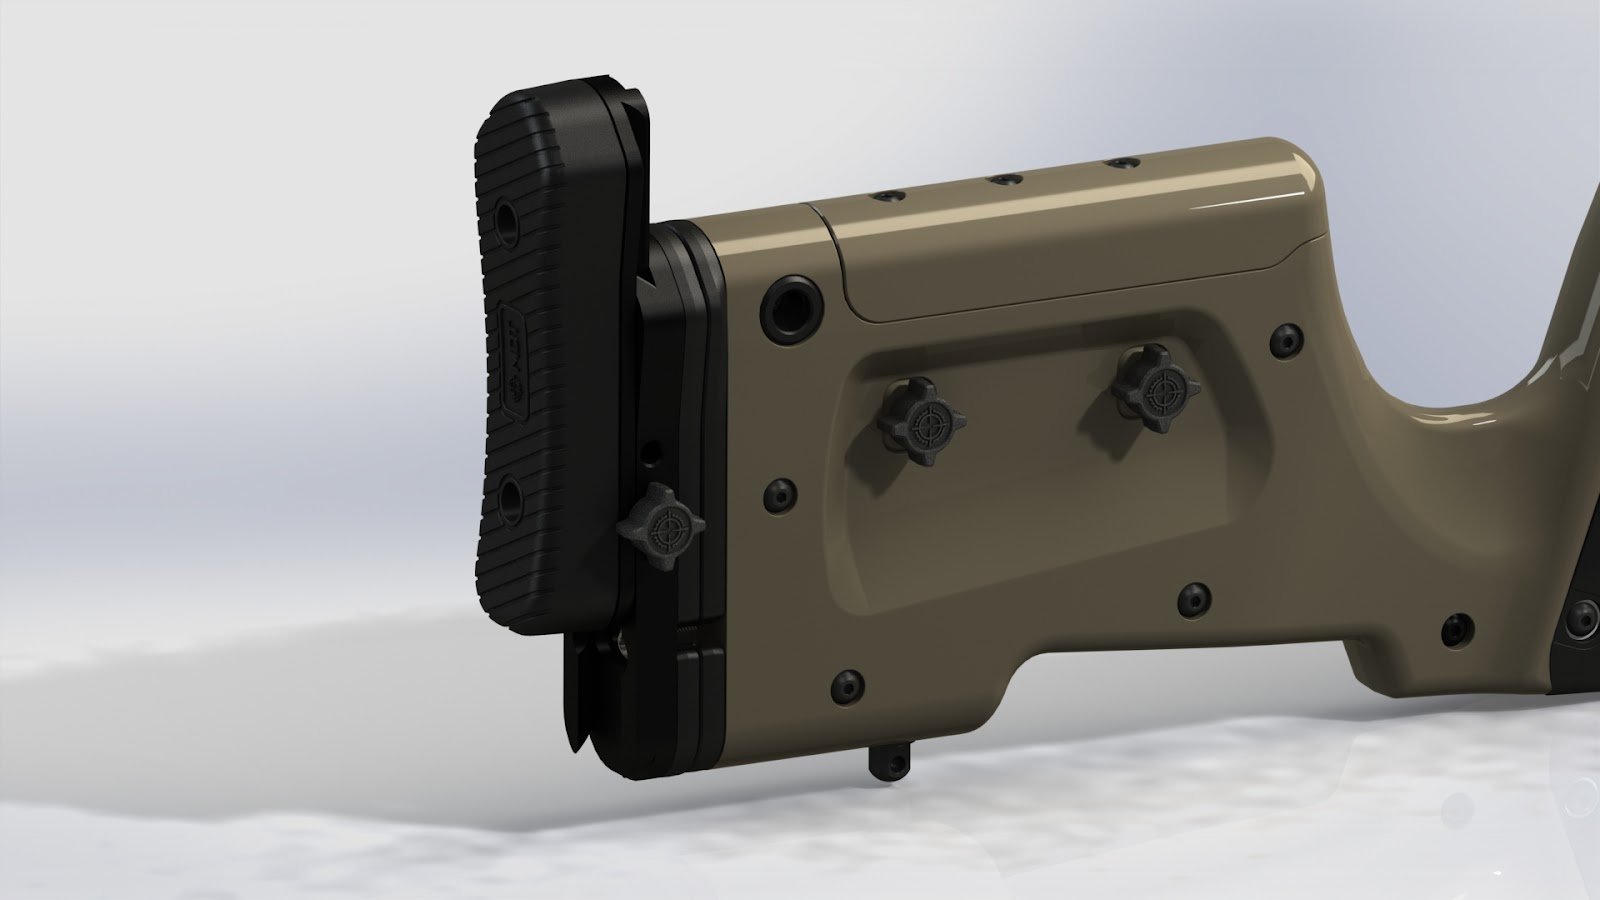
BUTTPAD ADJUSTMENT UPGRADE KIT
Thank you so much for choosing the MDT Buttpad Adjustment Upgrade Kit. This accessory attaches to various chassis/buttstocks allowing for vertical, horizontal and angular cant adjustment of your buttpad.
DETAILS
- Compatible with the MDT XRS & HNT26.
- Compatible with Oryx Sportsman chassis.
- Compatible with MDT SRS-Lite, SCS-Lite, & CCS buttstocks
- 0.4 lbs (0.18 kg)
- 6061-T6 aluminum construction.
- Vertical Adjustment from neutral position:
- 52mm (2in) Up
- 17mm (0.67in) Down
- Horizontal Adjustment: 14mm (0.55in) total, 7mm (0.28in) to each side
- Cant Adjustment: 13 degrees
- Adds 14.5mm (0.57in) to LOP
INSTALLATION
- Ensure firearm is unloaded
- Remove the magazine and bolt
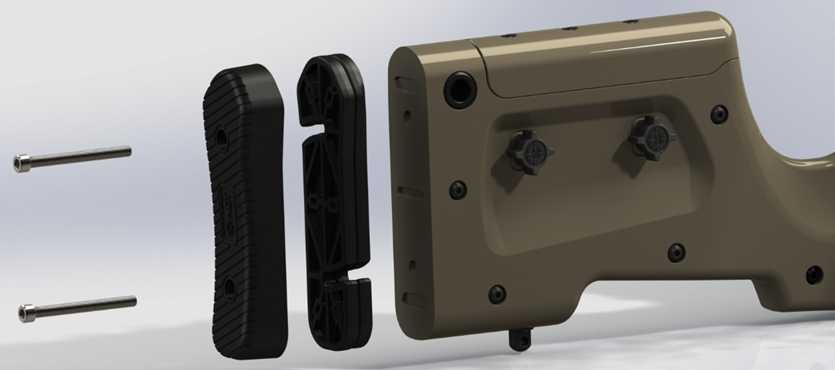
- Using a 5/32” Allen wrench remove the two screws securing the buttpad onto the stock. Store the buttpad and screws as they will not be used in this configuration.
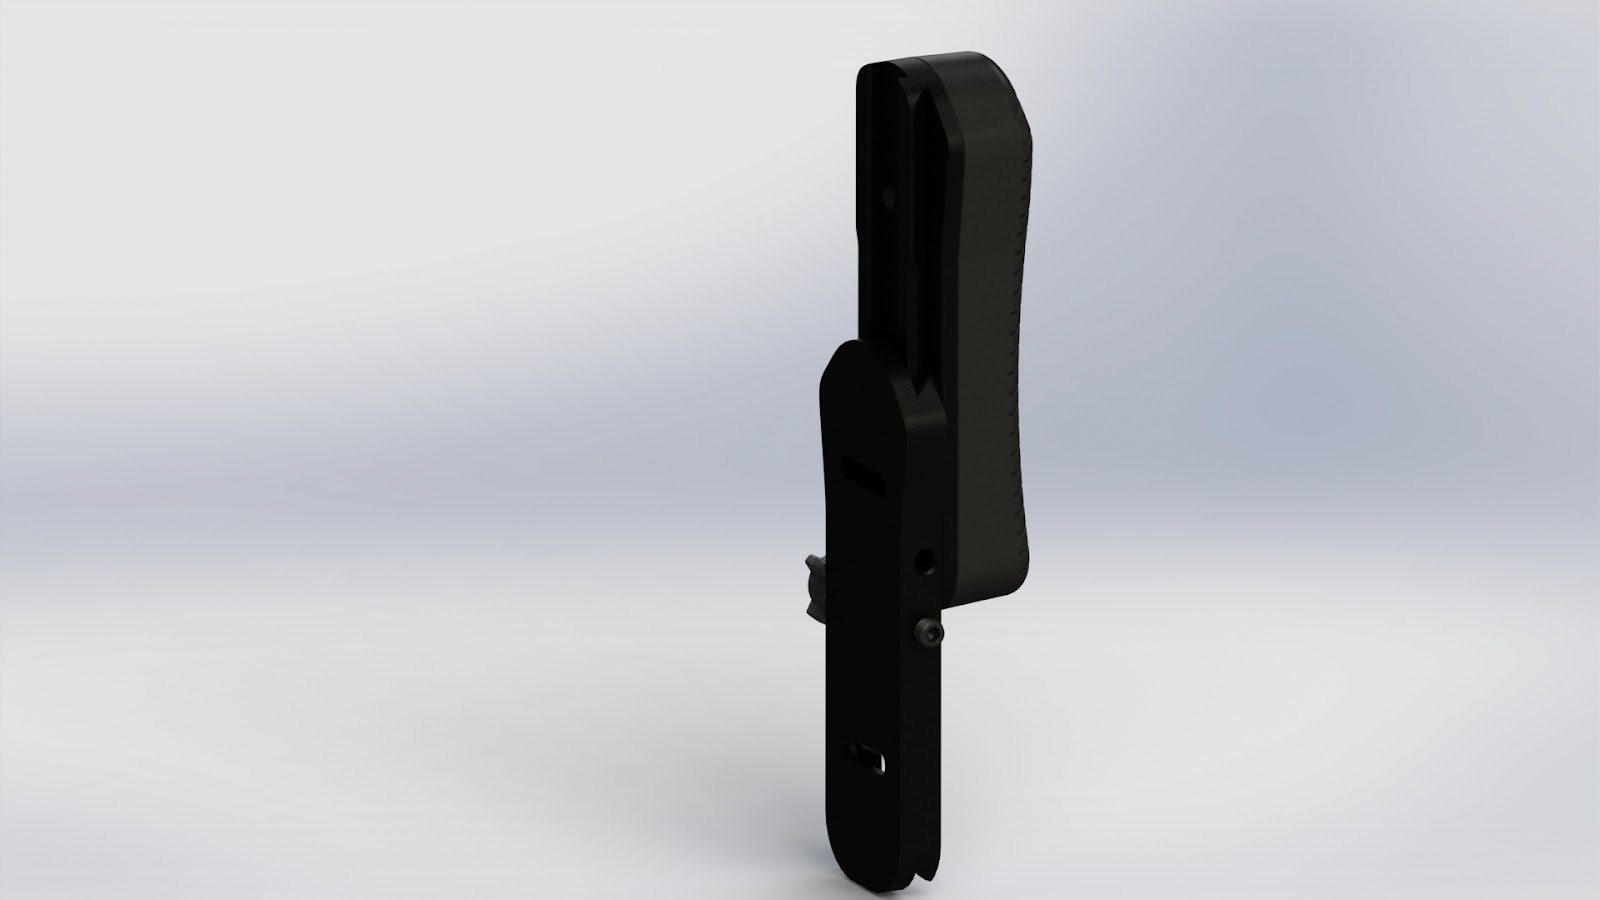
- Using a 1/8” Allen wrench loosen the set screw and thumbwheel so that the buttpad dovetail slider can be removed.
- Place the desired amount of LOP spacers between the stock and vertical buttpad adjustment base as shown below, inserting the #10-32 x 1-¾” screws into the slots on the vertical buttpad adjustment base and through the LOP spacers.
NOTE: The vertical buttpad adjustment base and buttpad dovetail plate will add slightly more length than 2 LOP spacers (0.5in).
NOTE: The extra #10-32 x 1” screw may need to be used on the top hole of the buttpad if using less than 2 LOP spacers (including the transition spacer).
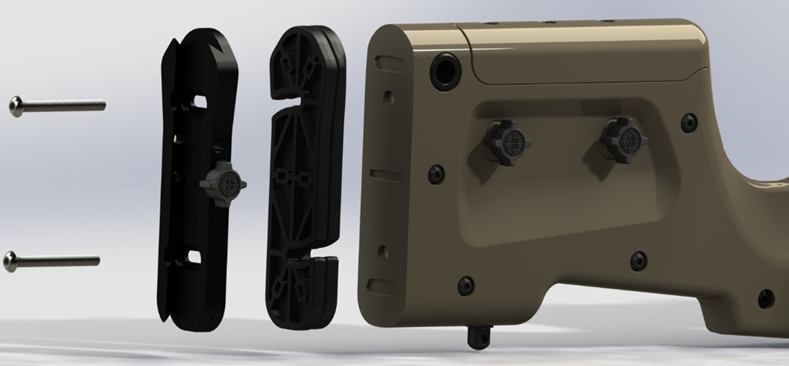
- Using a 1/8” Allen wrench, secure the vertical buttpad adjustment base onto the stock using the provided screws, ensuring the screws are properly aligned with the LOP spacers. Before fully tightening the screws, adjust the horizontal and cant positioning of the vertical buttpad adjustment base as desired.
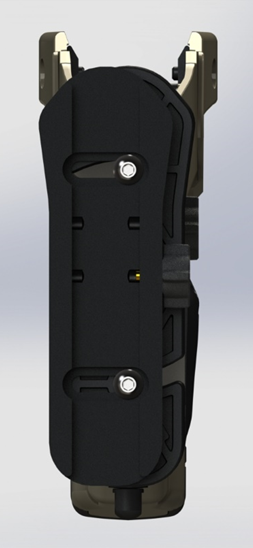
- Slide the buttpad dovetail slider into the vertical buttpad adjustment base. Using a 1/8” Allen wrench, tighten the set screw until it stops the buttpad from sliding out but doesn’t cause any resistance.
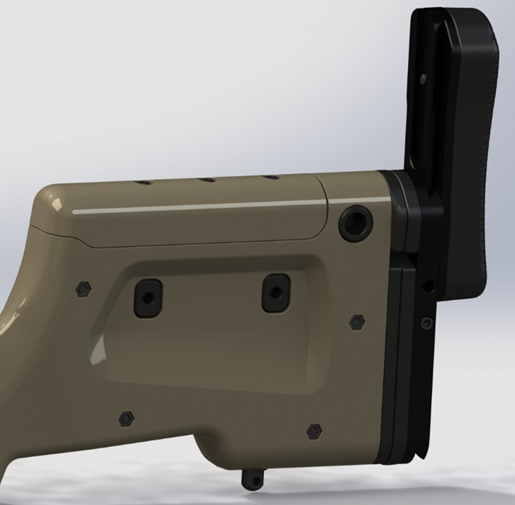
- Using the thumbwheel, secure the buttpad dovetail slider at the desired position. The installation is now complete.
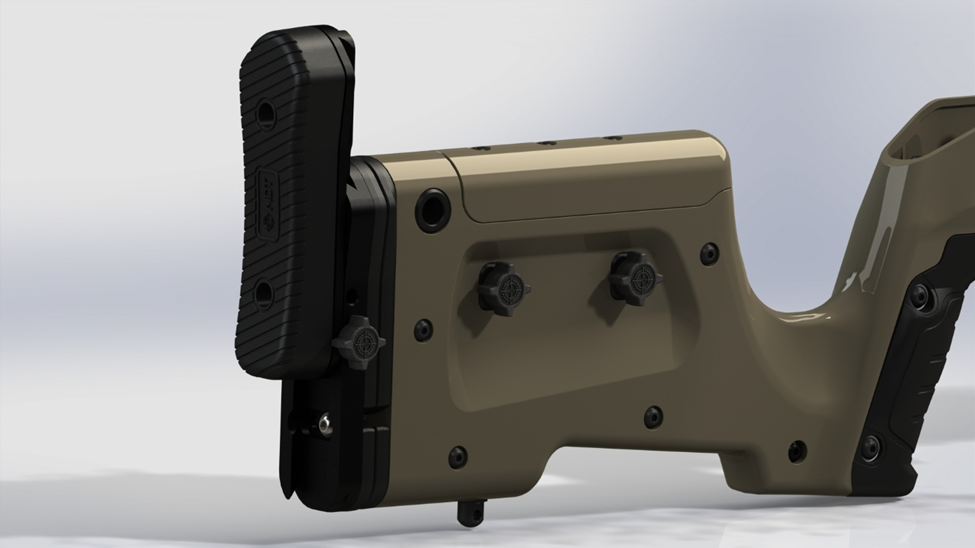
NOTE: If there is movement when the buttpad dovetail slider is secured in the highest position, move the thumbwheel to the higher of the two tapped holes to secure the buttpad dovetail slider.
MAINTENANCE INFORMATION |
NOTICE: THIS MANUAL COMPLEMENTS YOUR RIFLE MANUFACTURER’S MANUAL. FOLLOW ITS LUBRICATION AND MAINTENANCE INSTRUCTIONS. |
When should I clean and lubricate my new MDT chassis? |
• Before and after long-term storage; |
• Soon after being subject to adverse conditions such as rain, snow, mud, sleet, or saltwater; |
• Soon after operating in rough conditions such as lying on the ground outdoors or dropped in mud. |
How should I clean and lubricate my MDT chassis? |
• Use a damp (not wet) clean cloth to remove dirt and other stains from the surfaces. |
• Use a dry clean cloth to dry and finish the cleaning; |
• Do not apply oil on the chassis surfaces; |
• After cleaning, place a drop of gun oil in the sling swivel stud, magazine lock pin, action screw, and pistol grip screw. |
NOTE: AFTER USE UNDER EXTREME CONDITIONS, IT MAY BE NECESSARY TO DISASSEMBLE THE CHASSIS FOR PROPER CLEANING. |
Is the MDT chassis corrosion-proof? |
• Yes. the MDT chassis coating provides superior corrosion protection using Cerakote®. |
• However, only proper care can keep your firearm and chassis system in good operating condition, and maintain its appearance. |
• If after extensive use the protective coating on plated parts shows signs of reduced corrosion protection, recoat or replace the parts to ensure the integrity of the chassis. |
WARRANTY |
What warranty does MDT provide? |
• MDT offers a 100% satisfaction guarantee on all products. If you receive any of MDT product, but you are not completely satisfied, return it to MDT’s central office within 30 days for a 100% refund. |
• All our products come with lifetime support against defects. |
• Performing modifications/alterations to the product voids all warranties, expressed or implied. |
How do I claim warranty on a MDT product? |
• If you experience a problem with your MDT Rifle Chassis system, call us or initiate a service ticket through the MDT website. |
• Warranty claims must show the product model, a contact email, a phone number, and a description of the problem. |
How MDT process warranty claims? |
• Upon receiving the item, MDT decides whether to accept the warranty claim, and whether to repair or replace the parts, at its discretion. |
• MDT accepts no responsibility for loss or damage in transit. |
• MDT pays for shipping and insurance charges for the return to the owner, ONLY after accepting the warranty claim. |
• If non-warranty parts or services are required, MDT provides an estimate for approval prior to performing any service. |
What are the warranty limitations? |
• This warranty is exclusive and is in lieu of any and all other warranties, expressed or implied. No implied warranties of merchantability or fitness for a particular purpose are given and any and all liability for breach of any implied warranty or warranty created by law is disclaimed. |
• Under no circumstances shall MDT be liable for incidental or consequential damages with respect to economic loss, injury, death or property damage, whether as a result of breach of this warranty, negligence or otherwise. |
Jurisdictional Exceptions: |
• Some jurisdictions do not allow limitations on how long an implied warranty lasts, so the above limitation may not apply to you. |
• Some jurisdictions do not allow the exclusion or limitation of incidental or consequential damages, so the above limitation or exclusion may not apply to you completely or in part. |
• This warranty gives you specific legal rights. You may also have other rights that vary from jurisdiction to jurisdiction. |
SAFETY GUIDELINES |
1. ALWAYS KEEP THE MUZZLE POINTED IN A SAFE DIRECTION. |
Never allow your firearm to point at anything you do not intend to shoot. Always handle any firearm as if it were loaded and ready to shoot. UNLOAD ALL FIREARMS WHEN NOT IN USE. ALWAYS VERIFY. Load your firearm only when you are in the field or on the target range and ready to fire. Unload as soon as you finish shooting. Verify that the firearm is unloaded before storing and ALWAYS when you pick it up. |
2. DO NOT RELY ON ANY MECHANICAL SAFETY. |
Safety devices are not a substitute for safe handling procedures. Treat every firearm as if it can fire at any time, regardless of the safety position. Do not touch the trigger until you are ready to fire. |
3. UNDERSTAND THE TARGET AND WHAT IS BEYOND THE TARGET. |
Do not fire unless you know exactly where your shot is going, and what is beyond the expected point of impact. Never fire at a sound, a movement, or a patch of color. If you cannot see clearly what is beyond the target, DO NOT SHOOT. |
4. NEVER SHOOT AT WATER OR AT A HARD SURFACE. |
Shooting at water, rocks, or other hard surface may result in bullet fragmentation with unpredictable flight paths. |
5. USE PROPER AMMUNITION. |
The use of wrong ammunition, mixed ammunition, or improperly reloaded ammunition may result in serious injuries or death, and catastrophic damage to your firearm. Check each round before loading. If in doubt, DO NOT SHOOT. |
6. IF THE FIREARM FAILS TO FIRE, DO NOT MOVE. |
If the ammunition does not fire when you pull the trigger, stop and keep the muzzle pointed in a safe direction. Wait 15 seconds before opening the chamber. Look away from the chamber while opening it and removing the round. In semi-automatic firearms, remove the magazine before manually cycling the round. Properly discard the round immediately. DO NOT try to fire it again. |
7. ALWAYS WEAR EYE AND EAR PROTECTION WHEN SHOOTING. |
Wear protective shooting glasses to guard against any combustion discharges, cartridges ejection, or debris resulting from firing your firearm or firearms around you. Also, wear eye protection when you are disassembling or cleaning a firearm to guard against tensioned parts and cleaning solvents. Always use ear protection. |
8. VERIFY THAT ACTION AND BARREL ARE CLEAR BEFORE SHOOTING. |
Before loading your gun, inspect the action and barrel to ensure there are no obstructions such as snow, mud, excess lubricant, cleaning patches, or any other foreign material. |
9. LEARN THE PARTICULAR CHARACTERISTICS OF EACH FIREARM. |
Not all firearms are alike. Become very familiar with the firearm before shooting. Learn safe handling procedures for loading, unloading, carrying, shooting and storing each firearm before firing the first round. |
10. SHOOT SOBER! |
NEVER handle any firearm while under the influence of alcohol, drugs, or any medication that may impair your senses in any form. |
DISCLAIMER |
MDT SHALL NOT BE RESPONSIBLE IN ANY MANNER WHATSOEVER FOR INJURY, DEATH, OR DAMAGE TO PROPERTY AS A RESULT OF THE INTENTIONAL OR ACCIDENTAL MISUSE OF THIS PRODUCT, OR FROM ITS PROPER FUNCTION WHEN THE PRODUCT IS USED FOR PURPOSES FOR WHICH IT WAS NOT DESIGNED. |
Comments
Please sign in to leave a comment.