Premier Vertical Grip Installation manual
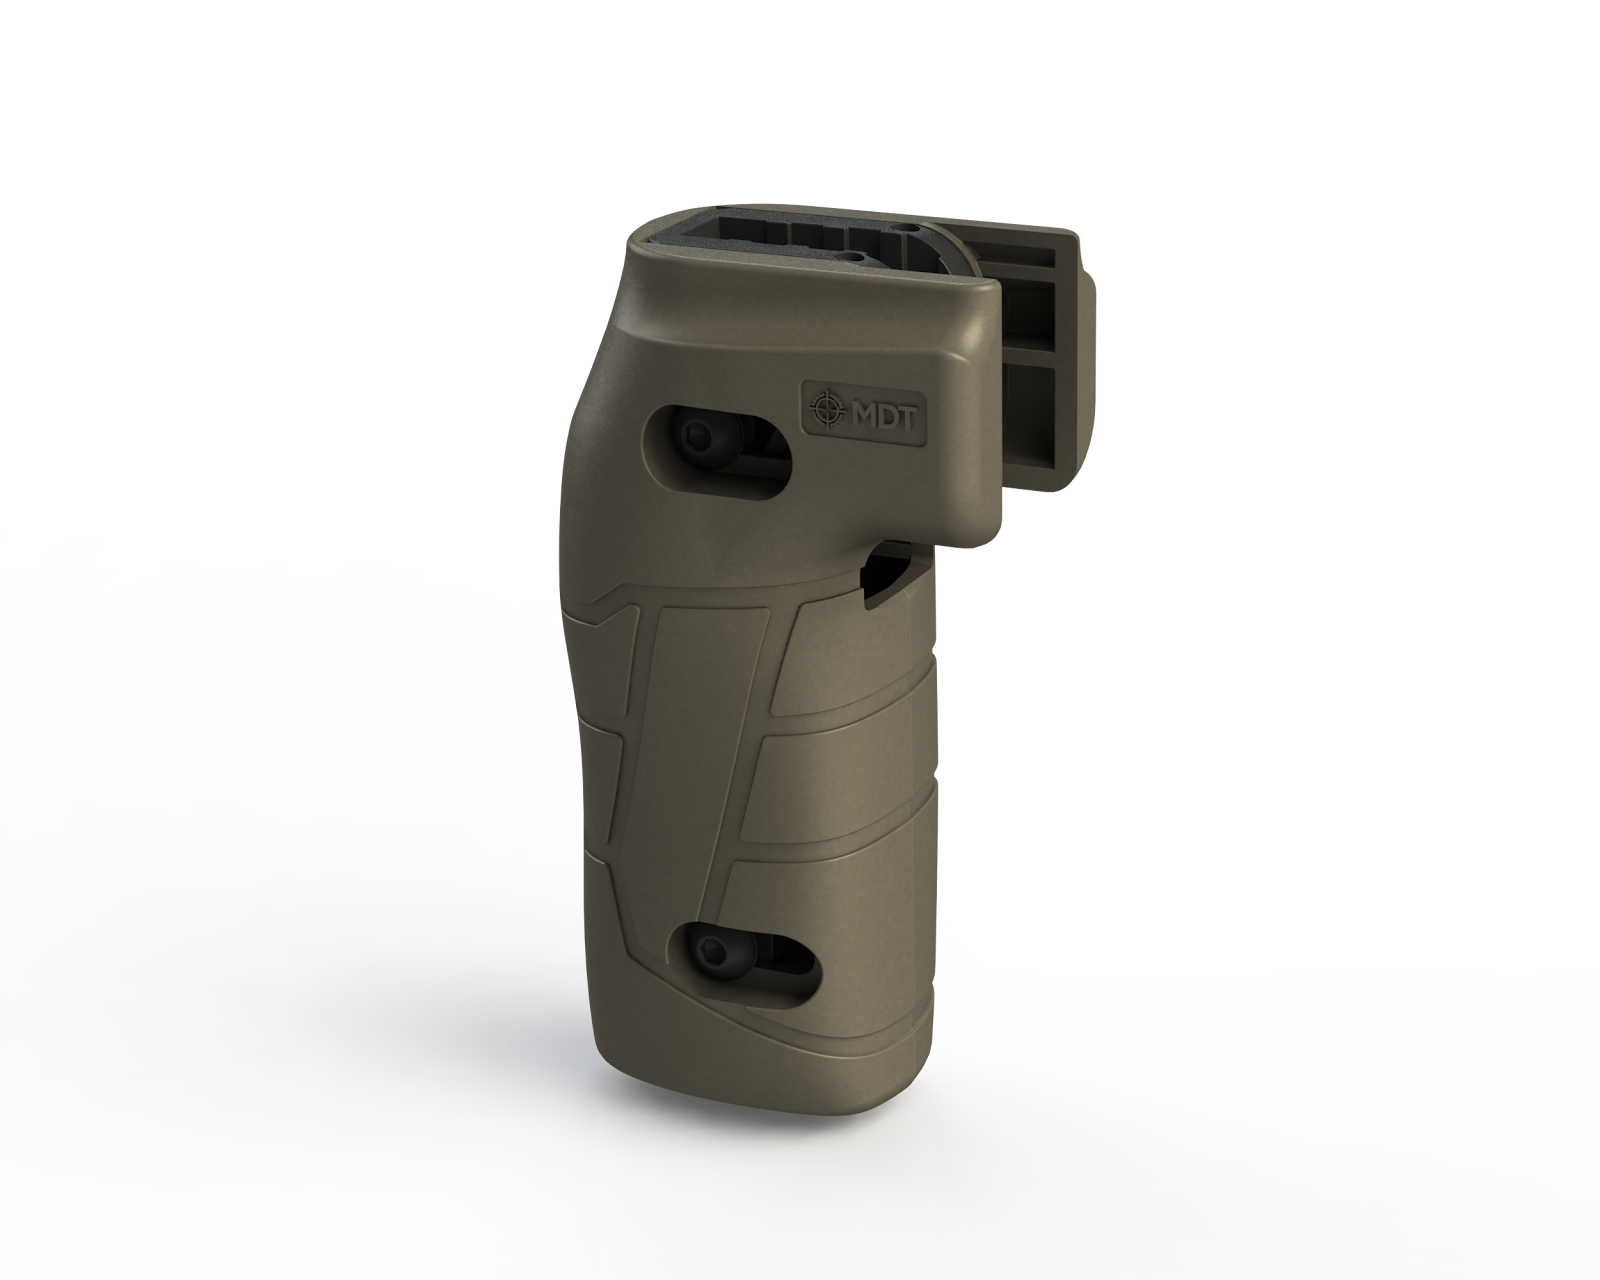
MDT Vertical Grip
V1.0 June 2020
Tables can't be imported directly. Please insert an image of your table which can be found here.
MDT Vertical Grip
Thank you for choosing the MDT Vertical Grip.
The MDT Vertical Grip allows the shooter to adjust the distance from the grip to the trigger, leading to better accuracy and functionality:
- ⅜” forward / backward adjustment
- Grooves and external texturing for non-slip gripping
TOOLS REQUIRED
- 3/16”Hex Allen wrench
- 1/8” Hex Allen wrench
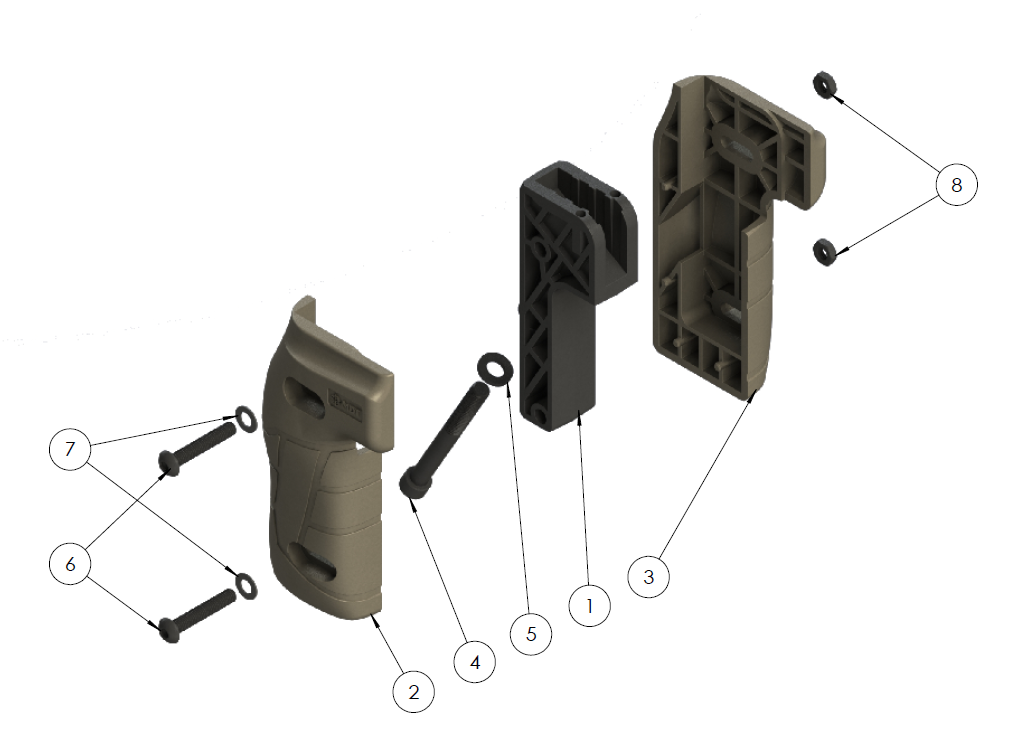
Tables can't be imported directly. Please insert an image of your table which can be found here.
ITEM DESCRIPTIONItems may vary depending on model and style.
Tables can't be imported directly. Please insert an image of your table which can be found here.
GRIP INSTALLATION
Tables can't be imported directly. Please insert an image of your table which can be found here.
- If necessary, remove the pistol grip screw from the chassis.
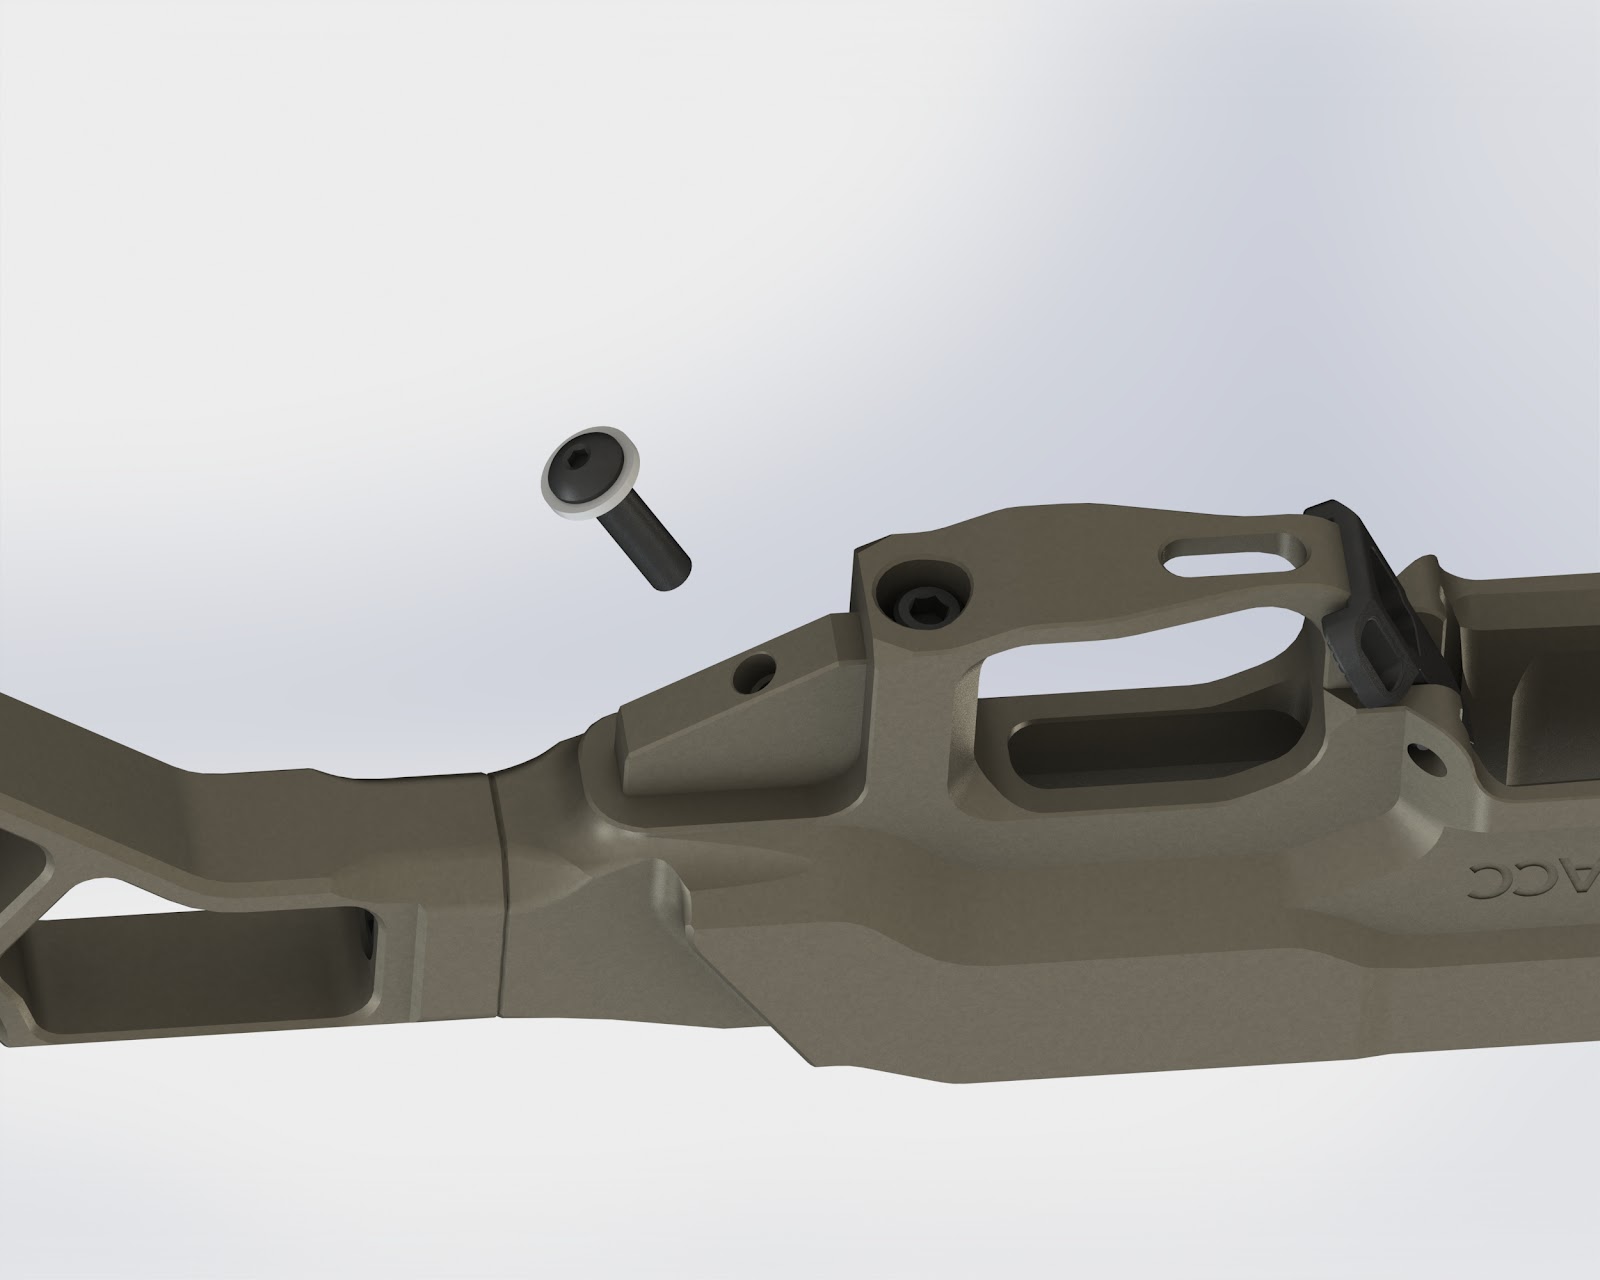
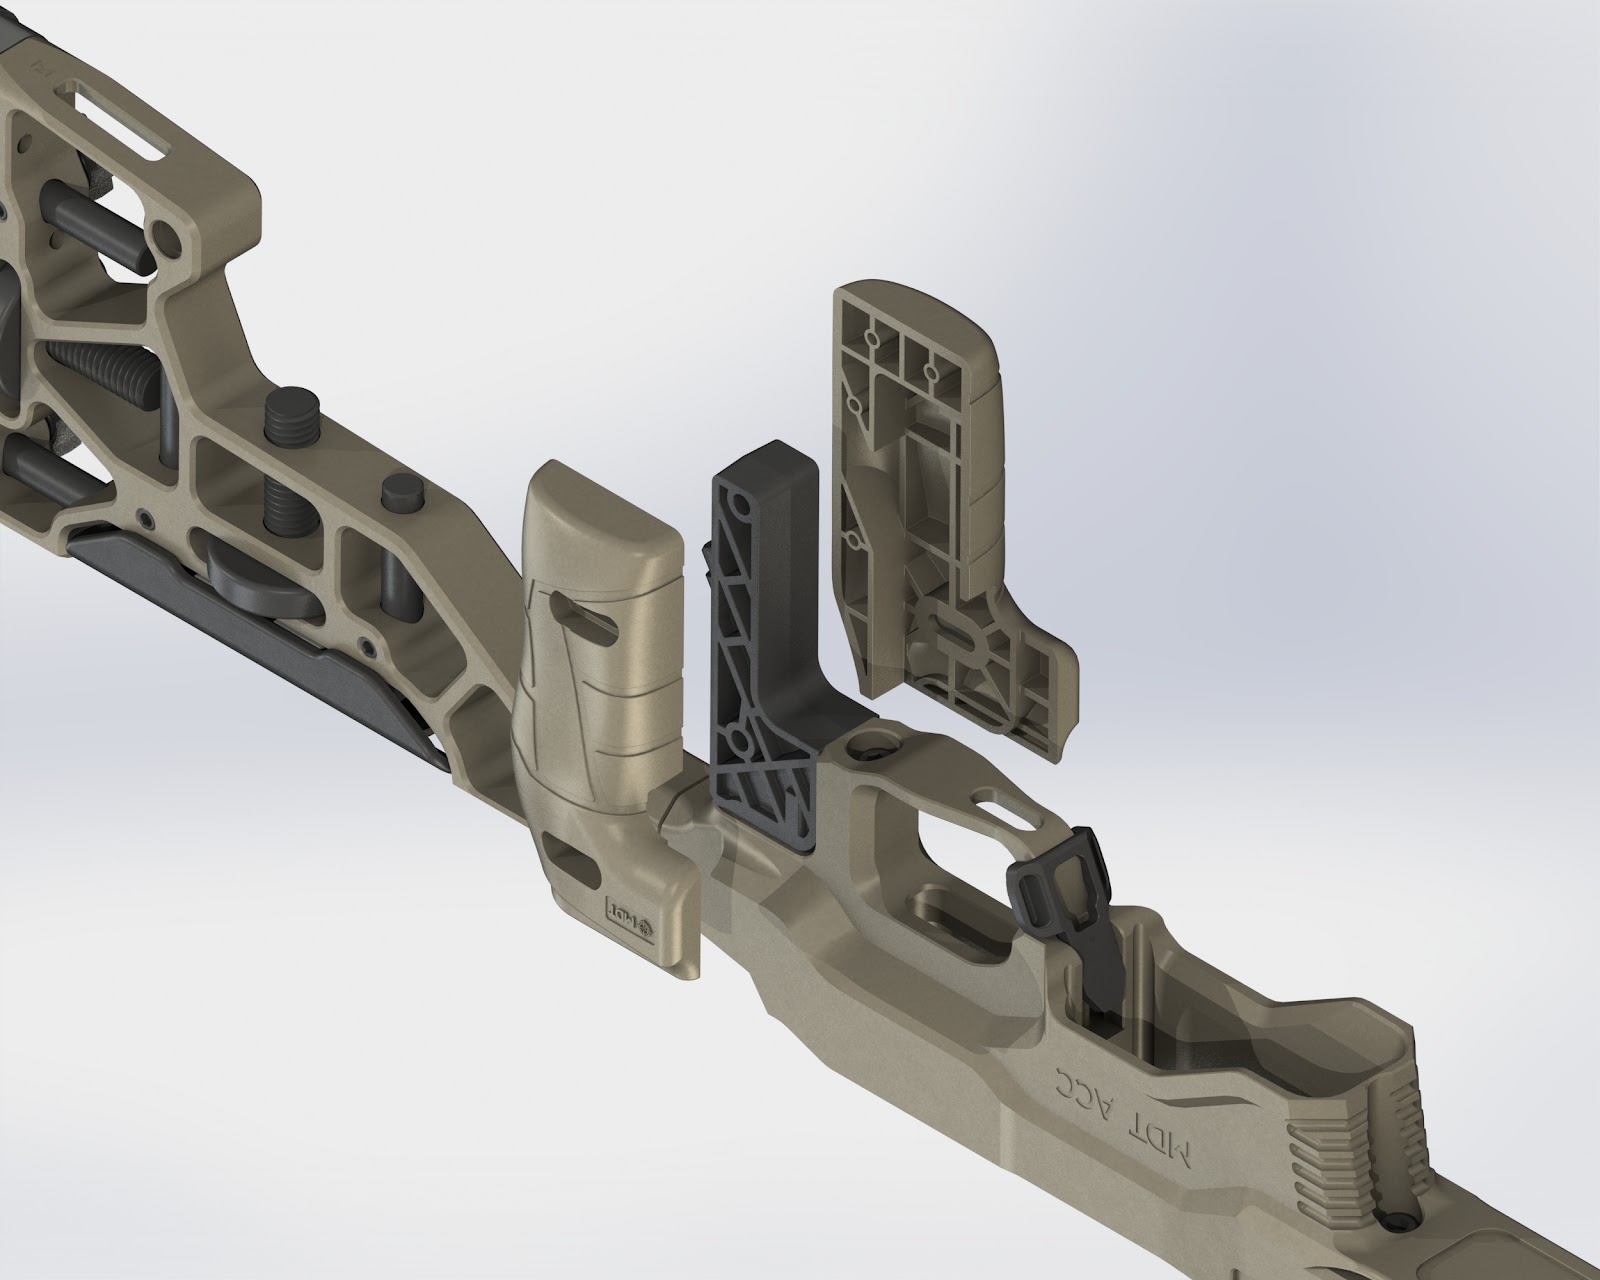
- Take the grip post and attach it to the chassis using the grip attachment screw and washer.
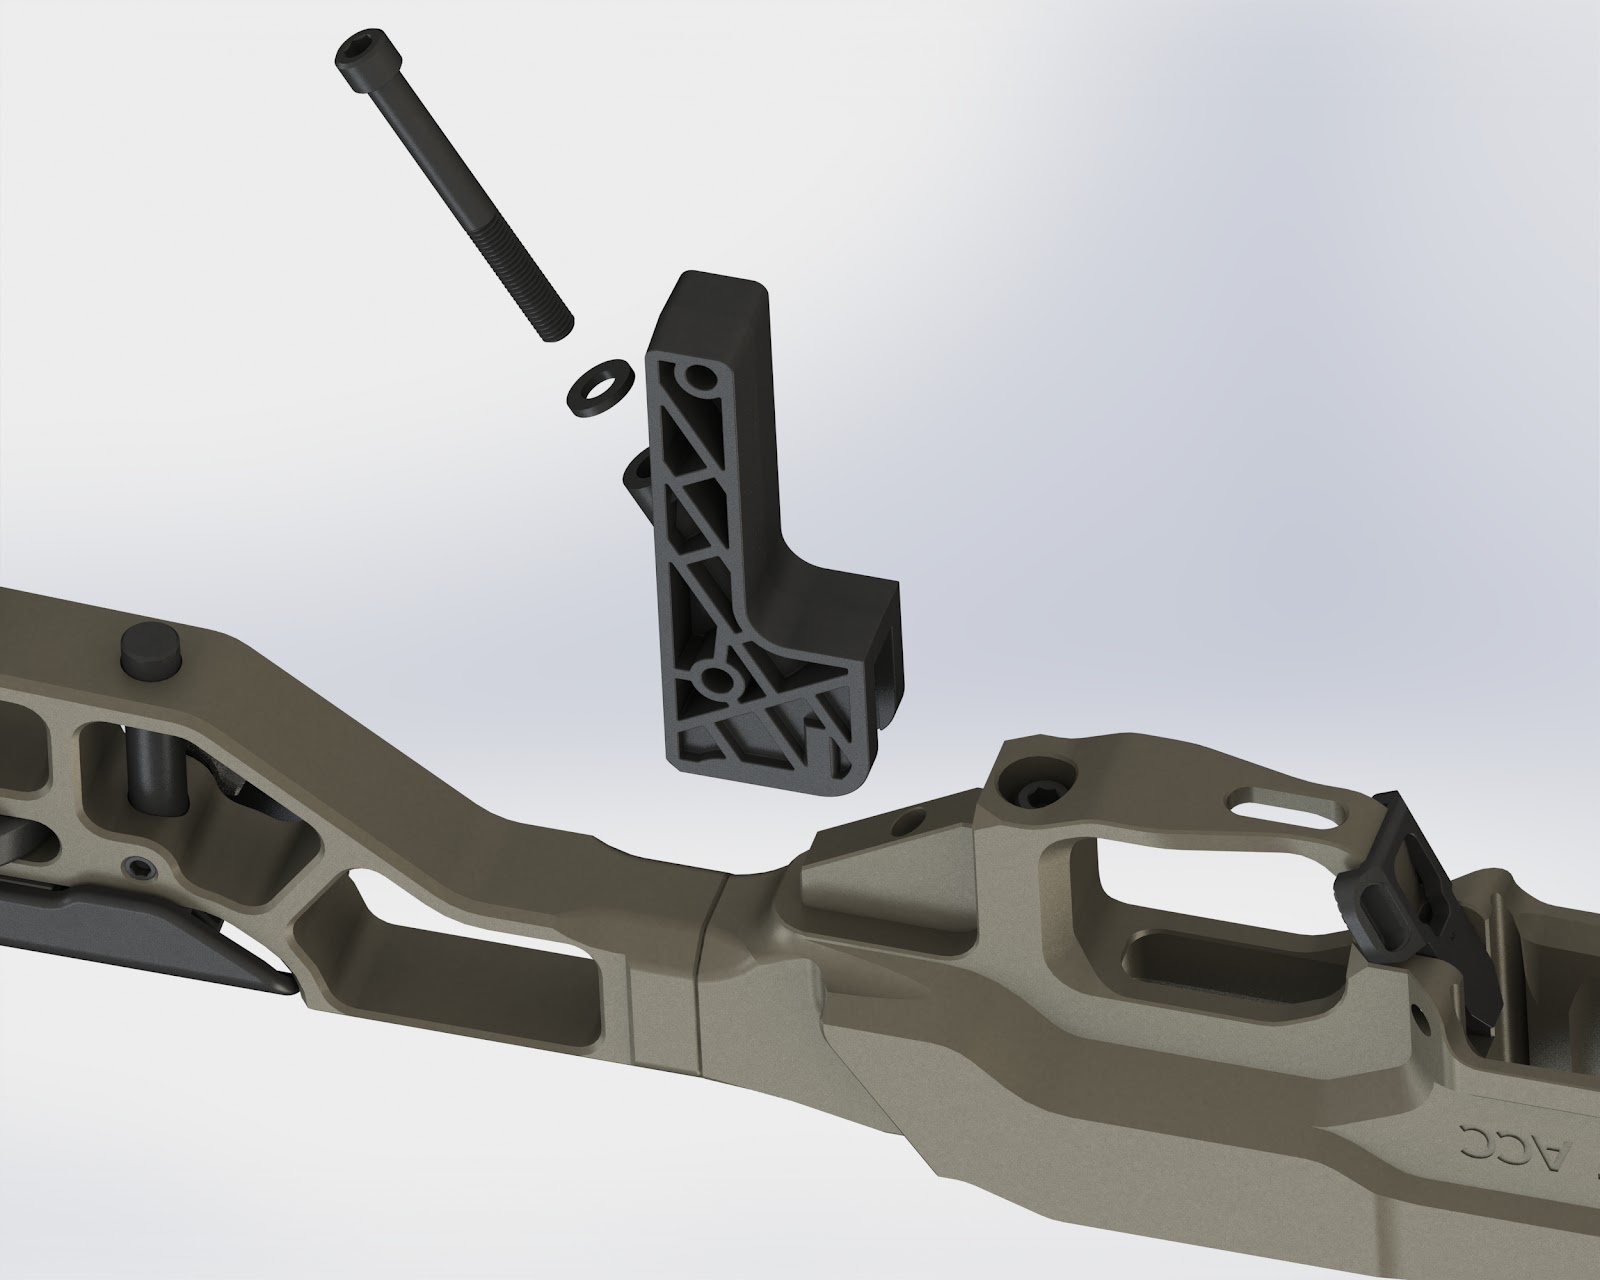
- Take the RH and LH grip panels and place them on either side of the grip post.
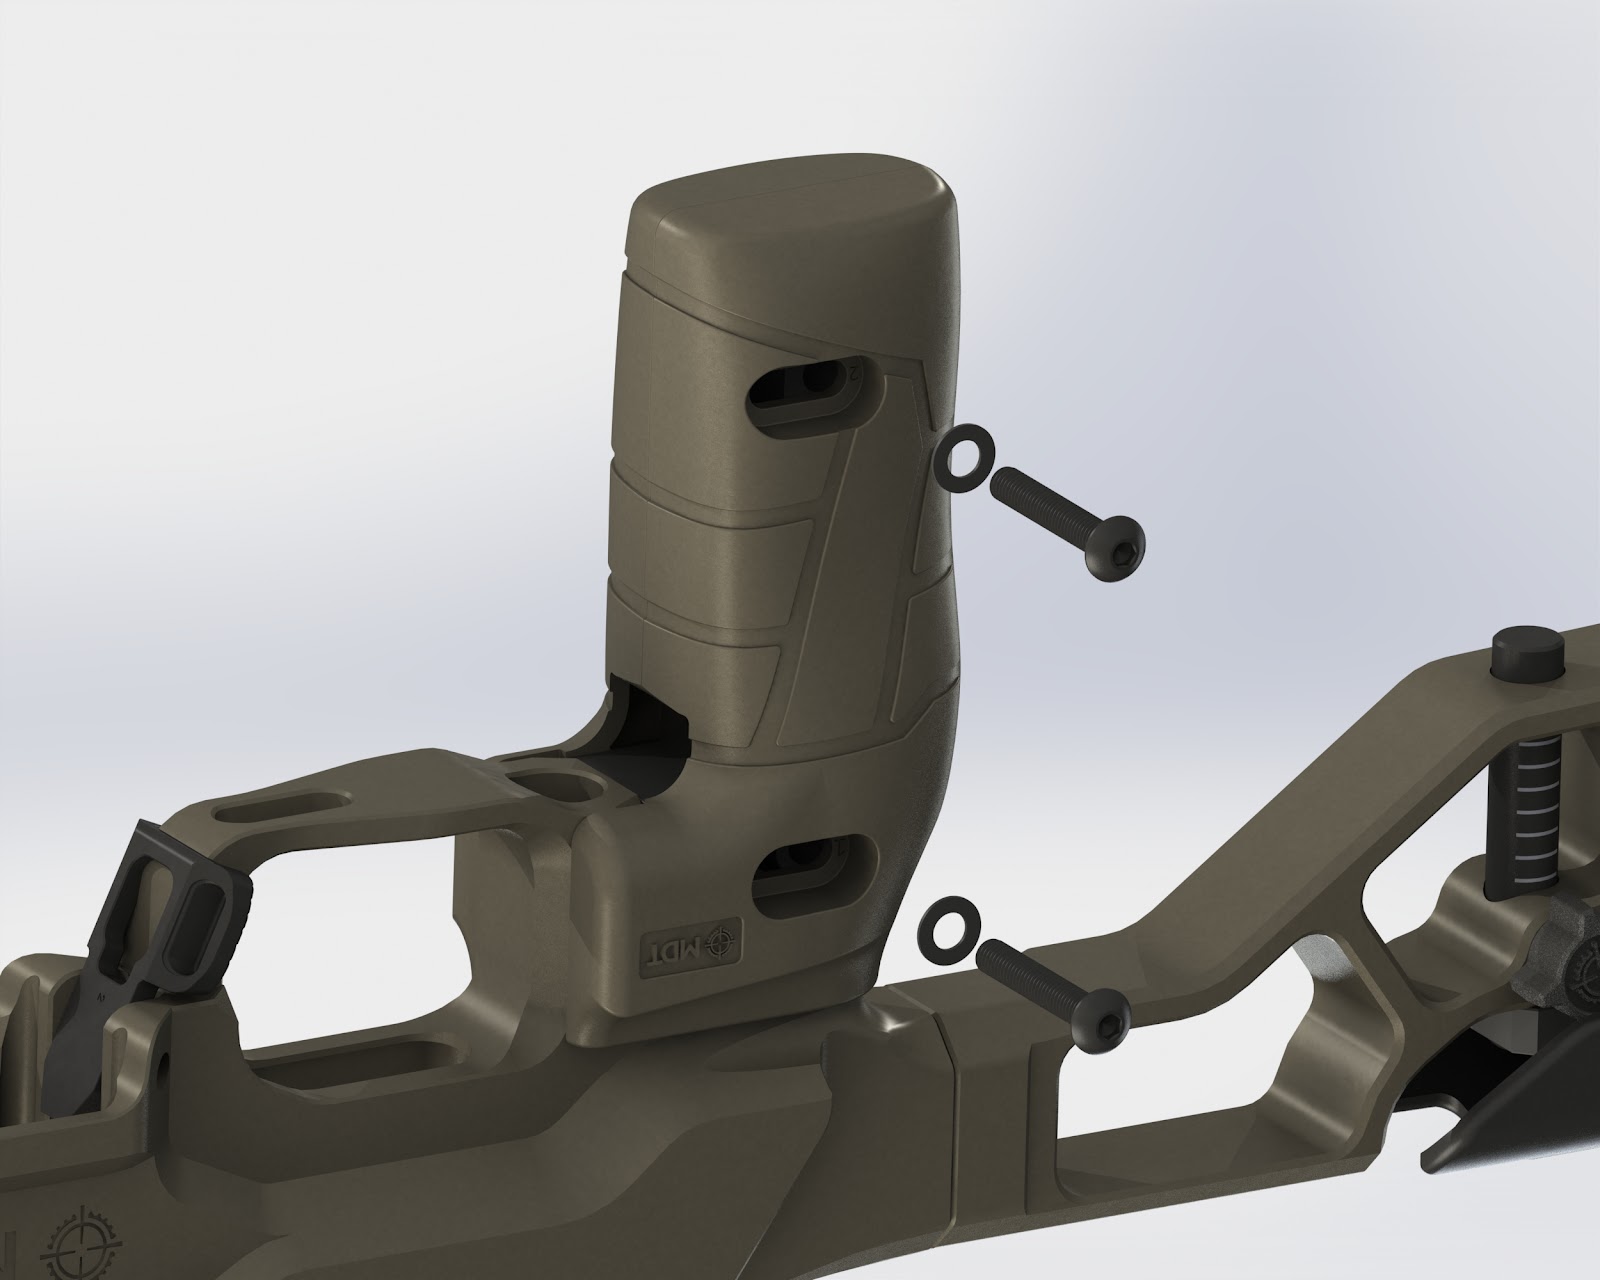
- Insert the panel attachment screws through the panel attachment washers and insert the screws through the slots on the RH panel, and then through the corresponding through-holes in the post.
- Insert the nuts into the slots on the LH panel, and lightly tighten them.
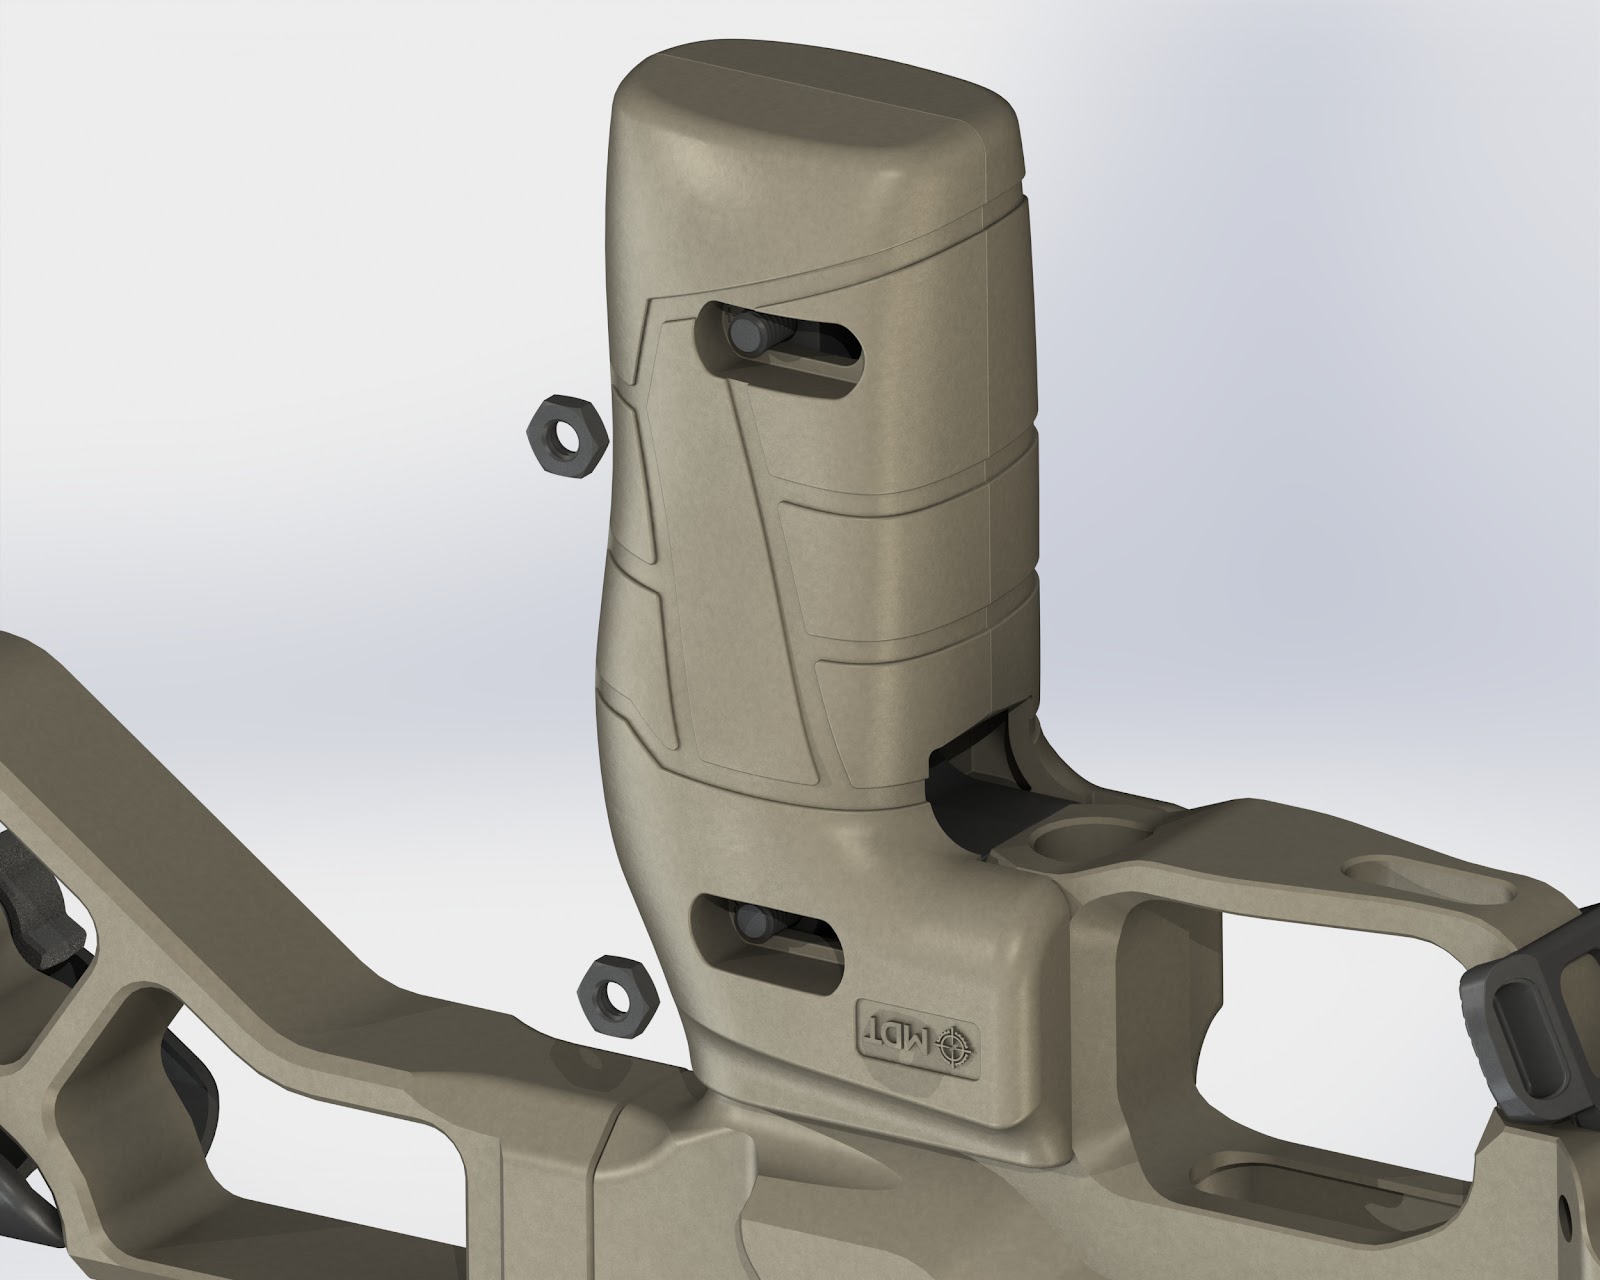
- Slide the grip back and forth to choose the position that fits you best.
- Tighten the panel attachment screws to ~20in/lbs.
CAUTION: RE-TIGHTEN ALL SCREWS, FASTENERS AND CASTLE NUTS AFTER INITIAL USE (APPROX. 100 ROUNDS)
Tables can't be imported directly. Please insert an image of your table which can be found here.
GRIP FORWARD/REARWARD ADJUSTMENT
Tables can't be imported directly. Please insert an image of your table which can be found here.
- Loosen the panel attachment screws.
- Slide the grip to the desired location.
- Re-tighten the panel attachment screws to 20in/lbs.
Tables can't be imported directly. Please insert an image of your table which can be found here.
MAINTENANCE INFORMATION NOTICE: THIS MANUAL COMPLEMENTS YOUR RIFLE MANUFACTURER’S MANUAL. FOLLOW ITS LUBRICATION AND MAINTENANCE INSTRUCTIONS. When should I clean and lubricate my new MDT chassis? How should I clean and lubricate my MDT chassis? NOTE: AFTER USE UNDER EXTREME CONDITIONS, IT MAY BE NECESSARY TO DISASSEMBLE THE CHASSIS FOR PROPER CLEANING. Is the MDT chassis corrosion-proof? WARRANTY What warranty does MDT provide? How do I claim warranty on a MDT product? How MDT process warranty claims? What are the warranty limitations? Jurisdictional Exceptions: SAFETY GUIDELINES 1. ALWAYS KEEP THE MUZZLE POINTED IN A SAFE DIRECTION. 2. DO NOT RELY ON ANY MECHANICAL SAFETY. 3. UNDERSTAND THE TARGET AND WHAT IS BEYOND THE TARGET. 4. NEVER SHOOT AT WATER OR AT A HARD SURFACE. 5. USE PROPER AMMUNITION. 6. IF THE FIREARM FAILS TO FIRE, DO NOT MOVE. 7. ALWAYS WEAR EYE AND EAR PROTECTION WHEN SHOOTING. 8. VERIFY THAT ACTION AND BARREL ARE CLEAR BEFORE SHOOTING. 9. LEARN THE PARTICULAR CHARACTERISTICS OF EACH FIREARM. 10. SHOOT SOBER! DISCLAIMER
