MDT Elite cheek piece instructions
MDT THIN CHEEK RISER
V1.0 February 2021
Tables can't be imported directly. Please insert an image of your table which can be found here.
MDT THIN CHEEK RISER
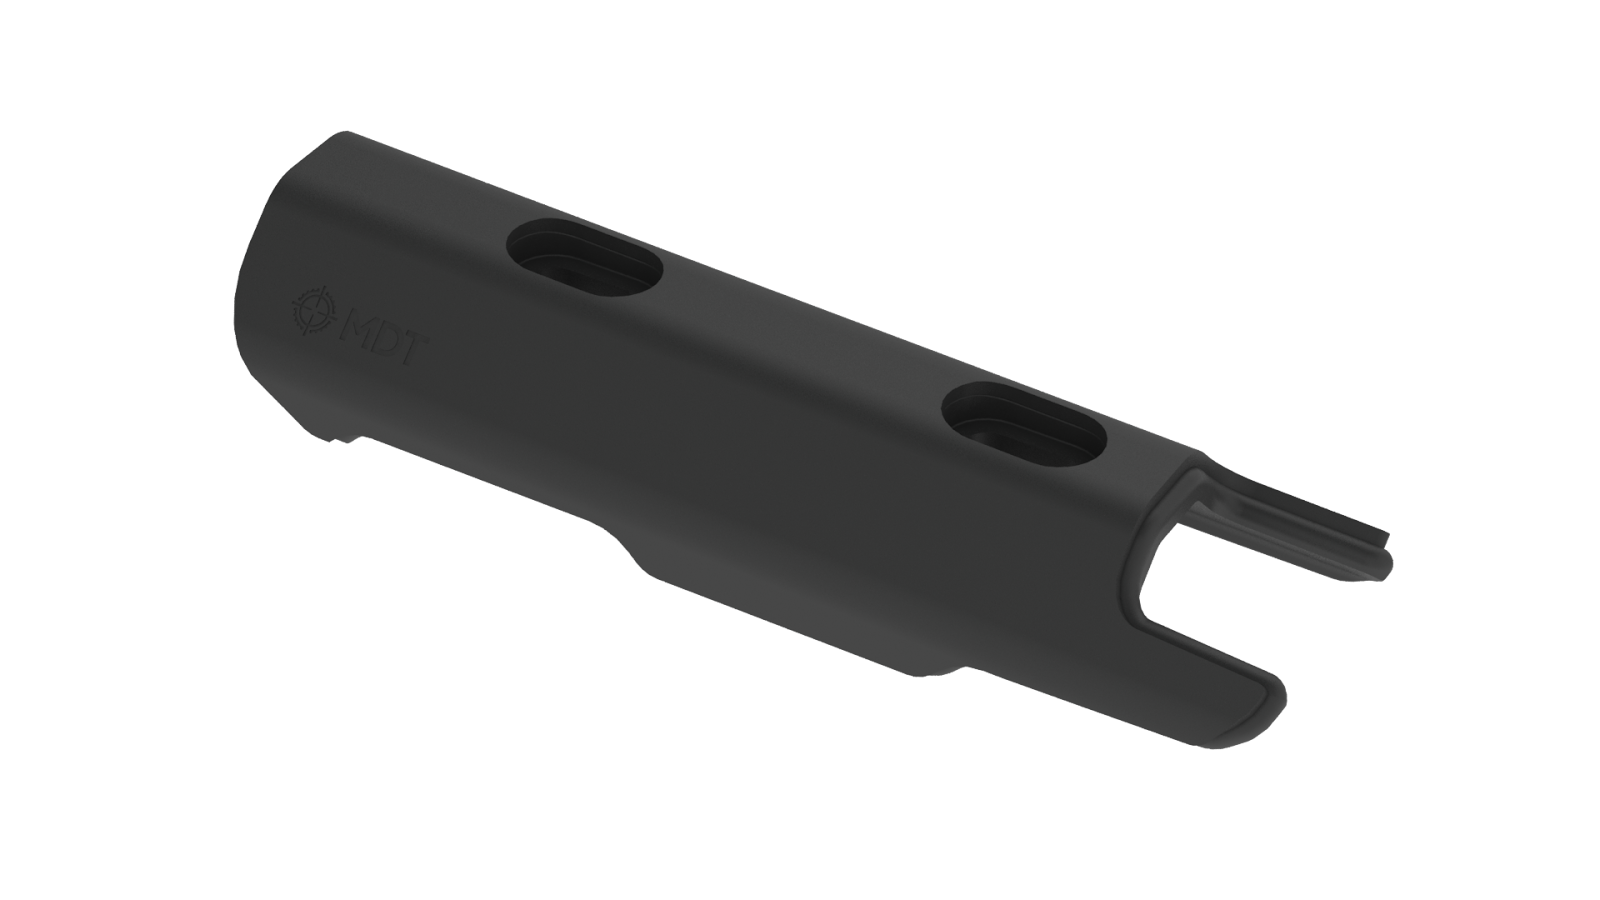
Thank you for choosing this high quality MDT accessory! The MDT Thin Cheek Riser is designed to be a direct replacement for the standard SRS family of cheek risers, which provides a narrower footprint and added shooter comfort. The narrower profile allows the cheek riser to be lowered all the way down and centred on the buttstock without interfering with the thumbwheels, making shooting weakside easier. With the addition of the top slots, the cheek riser is also able to be shifted forward or rearward slightly as per shooter preference. Additionally, the adhesive-backed, foam pad insulates the cheek riser plastic and provides a more comfortable interface for the shooter, making long strings of fire or long periods of time on the gun more enjoyable.
CAUTION: AVOID RESTING OR HITTING THE BARREL AGAINST ANY SURFACE WHILE HANDLING THE ACTION, STOCK, AND CHASSIS.
Tables can't be imported directly. Please insert an image of your table which can be found here.
Installation
Tools needed: ⅛” Hex Key
Approximate Time: 2-3 minutes
Tables can't be imported directly. Please insert an image of your table which can be found here.
Pre-Installation- Ensure that the firearm is unloaded and pointed in a safe direction.
- Remove the magazine (if inserted) and bolt.
Tables can't be imported directly. Please insert an image of your table which can be found here.
Installing the MDT Thin Cheek Riser- Using a ⅛” allen key, remove the currently installed cheek riser from your chassis.
- Depending on which buttstock you’re installing the MDT Thin Cheek Riser on to, you will need to select the correct screws that are supplied so that you’re able to get the maximum adjustment out of your buttstock. For the SRS-X Elite SHORT buttstock, be sure to use the longer supplied screws (#10-32 x ¾” BHCS), for every other buttstock use the shorter supplied screws (#10-32 x ⅝” BHCS).
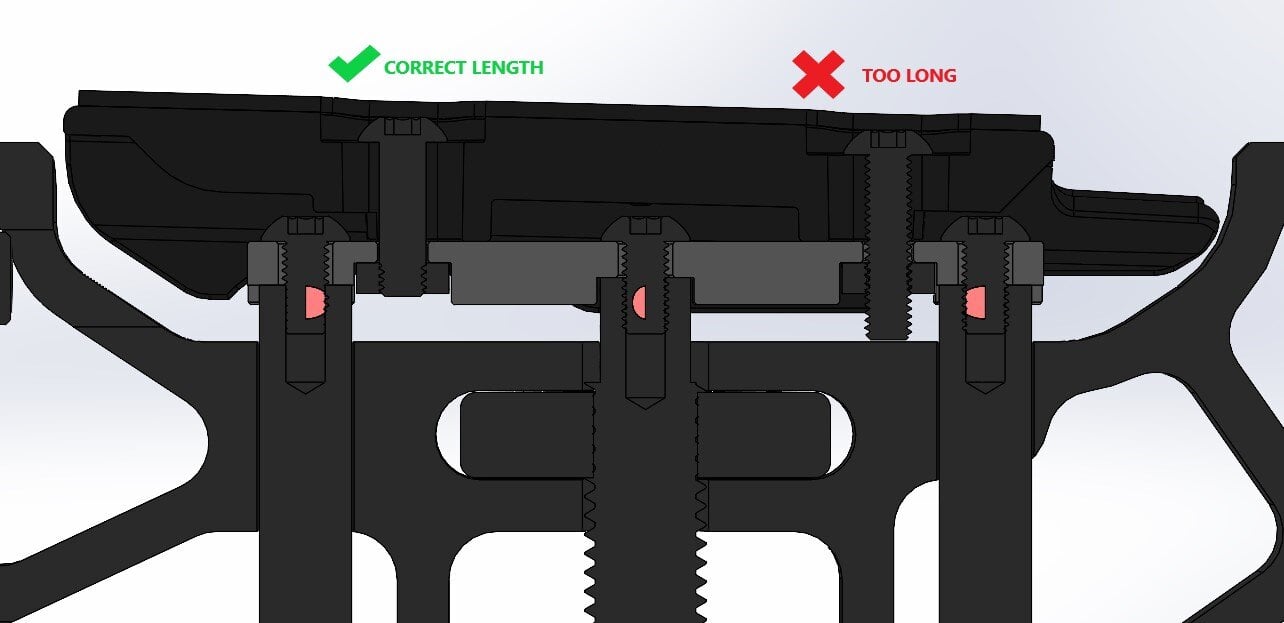
Detailed view of SRS-X Elite cheek riser and cant plate which it attaches to.
- You may find that it is easier to install the MDT Thin Cheek Riser with the whole cheek riser assembly removed from the buttstock, however, it is not required. If you would like to remove the whole cheek riser assembly, simply loosen the side thumb wheels and raise the cheek riser up until it can be removed from the buttstock.
- When installing the new cheek riser, insert the correct #10-32 screw through the cheek riser and hold it in place with the same ⅛” allen key that you used to remove the previous cheek riser.
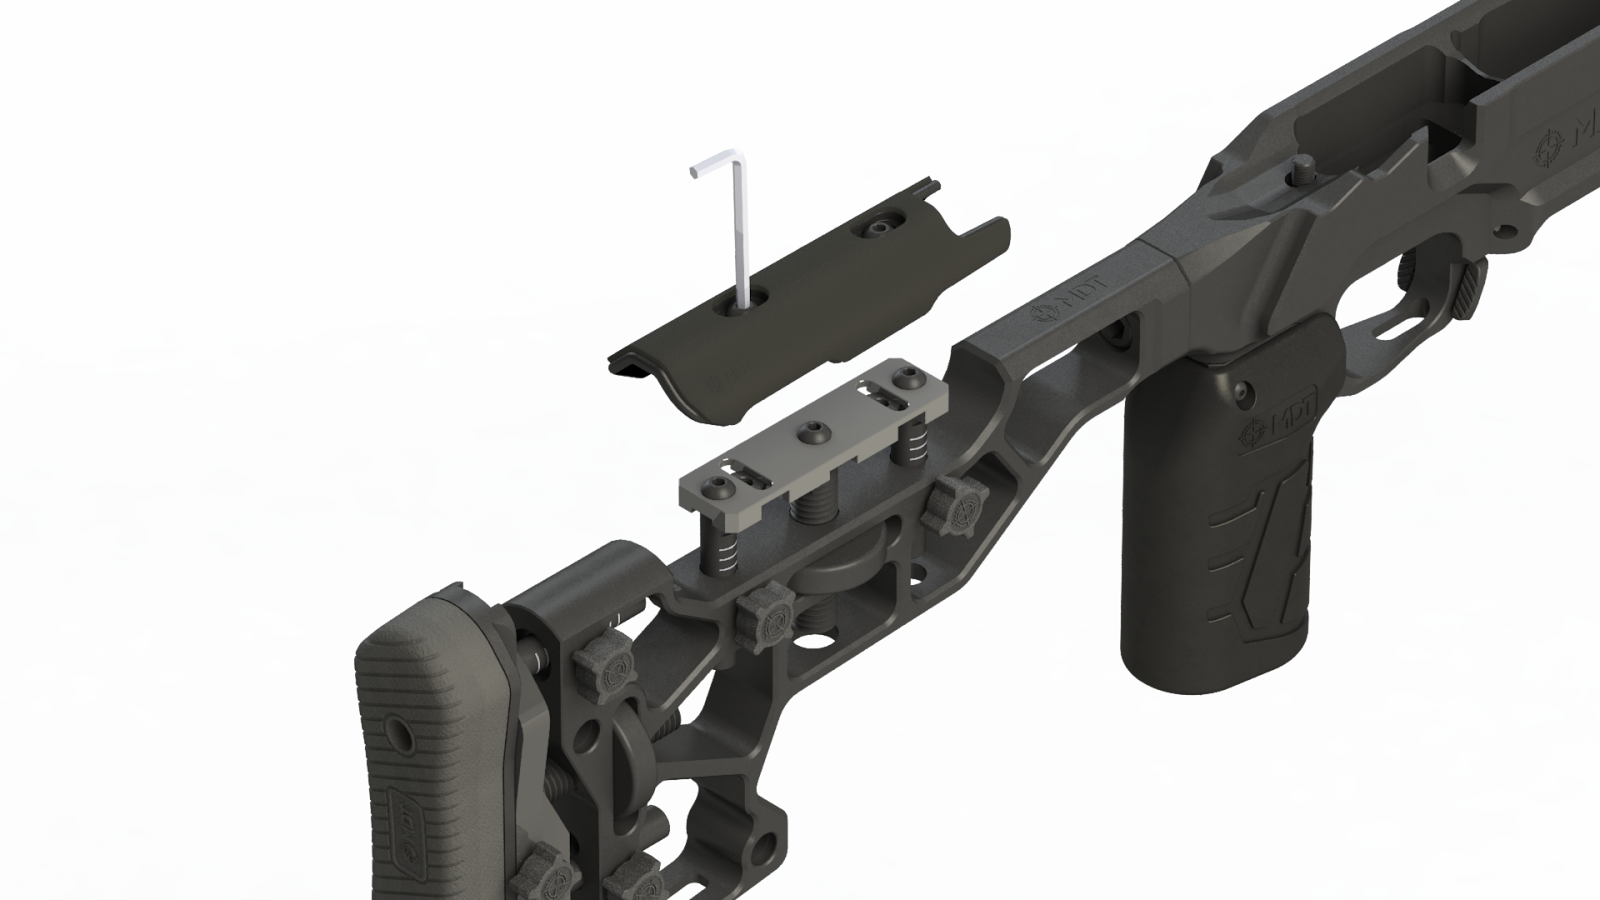
- With your other hand, hold the #10-32 hex nut in the lot on the underside of the cheek riser cant plate (highlighted in red below).
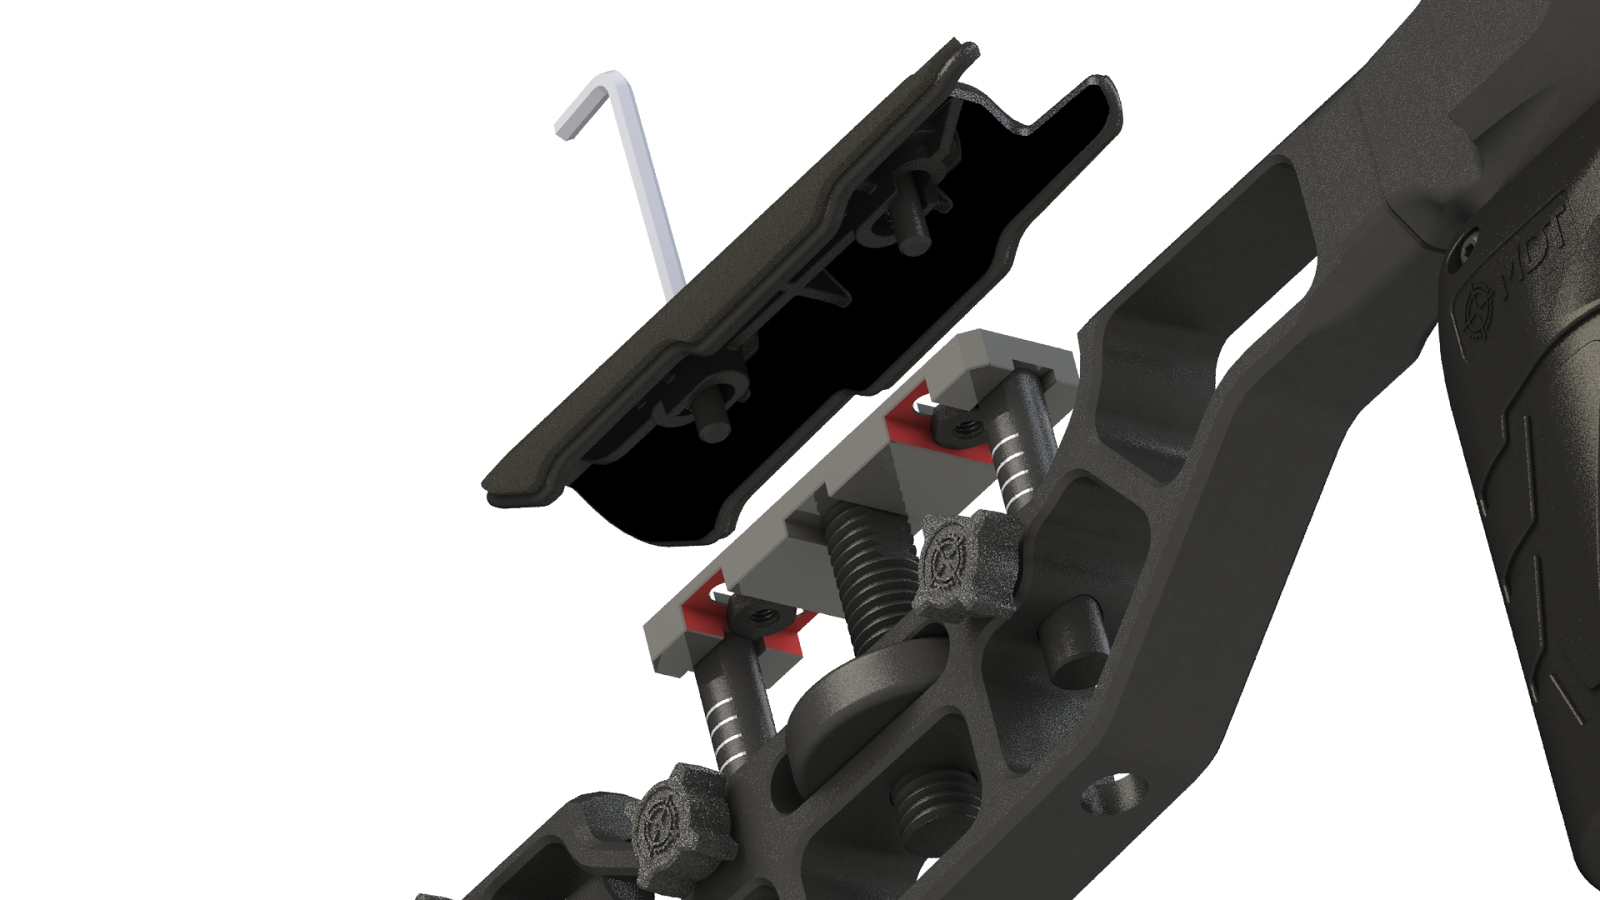
- Keeping the hex nut aligned with your hand, lower the cheek riser down on to the cheek riser assembly and thread the #10-32 screw into the hex nut 2-3 threads, but do not fully tighten it.
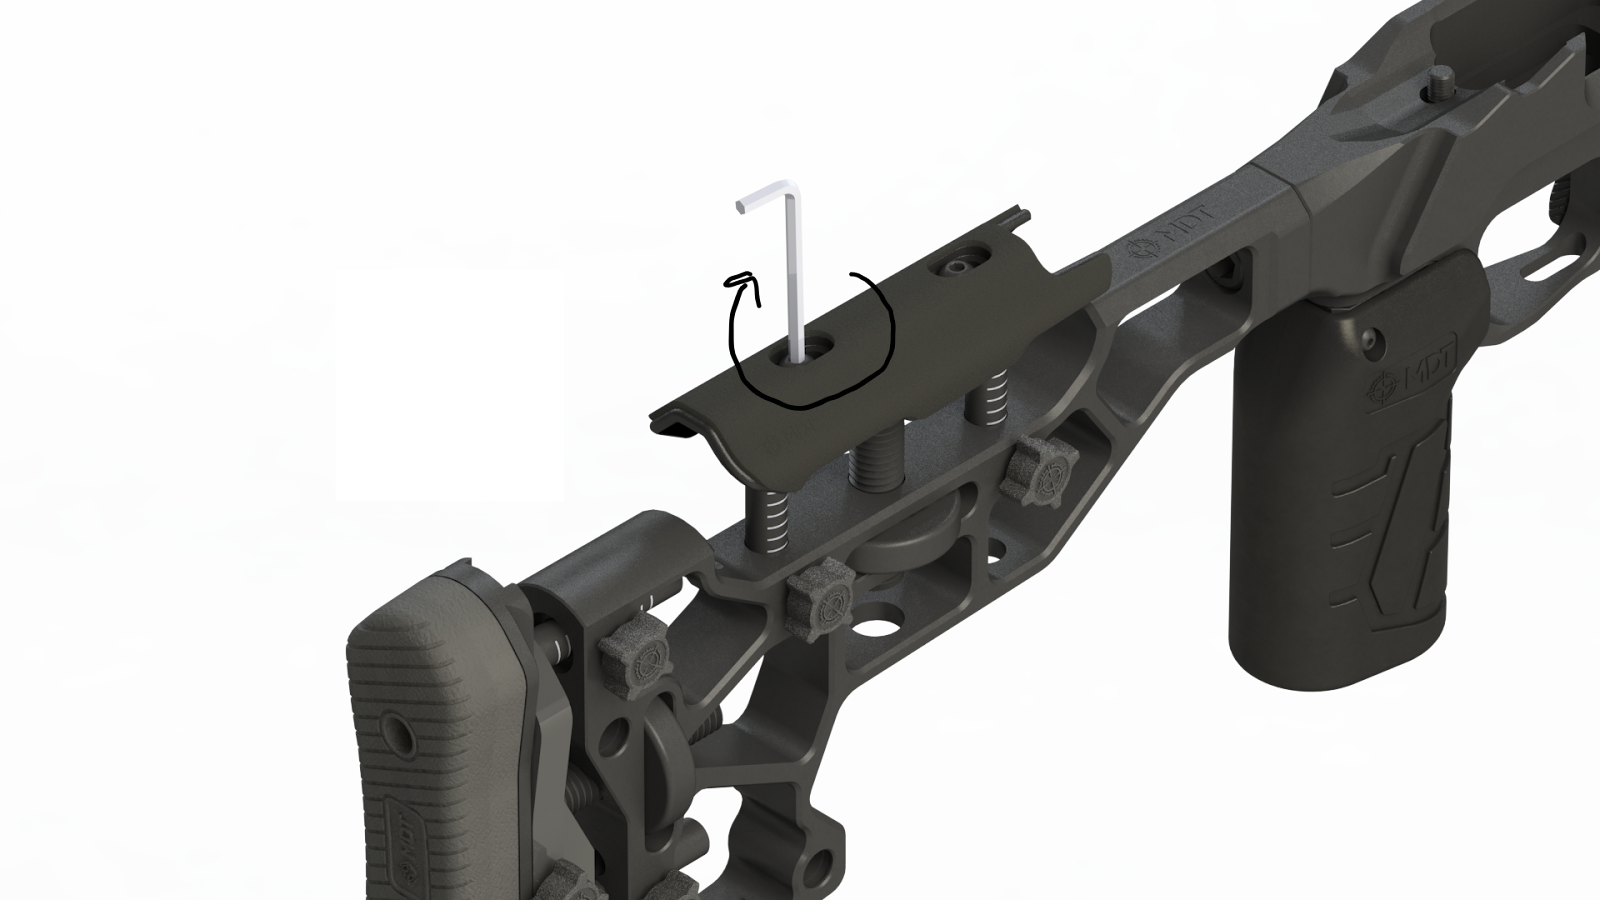
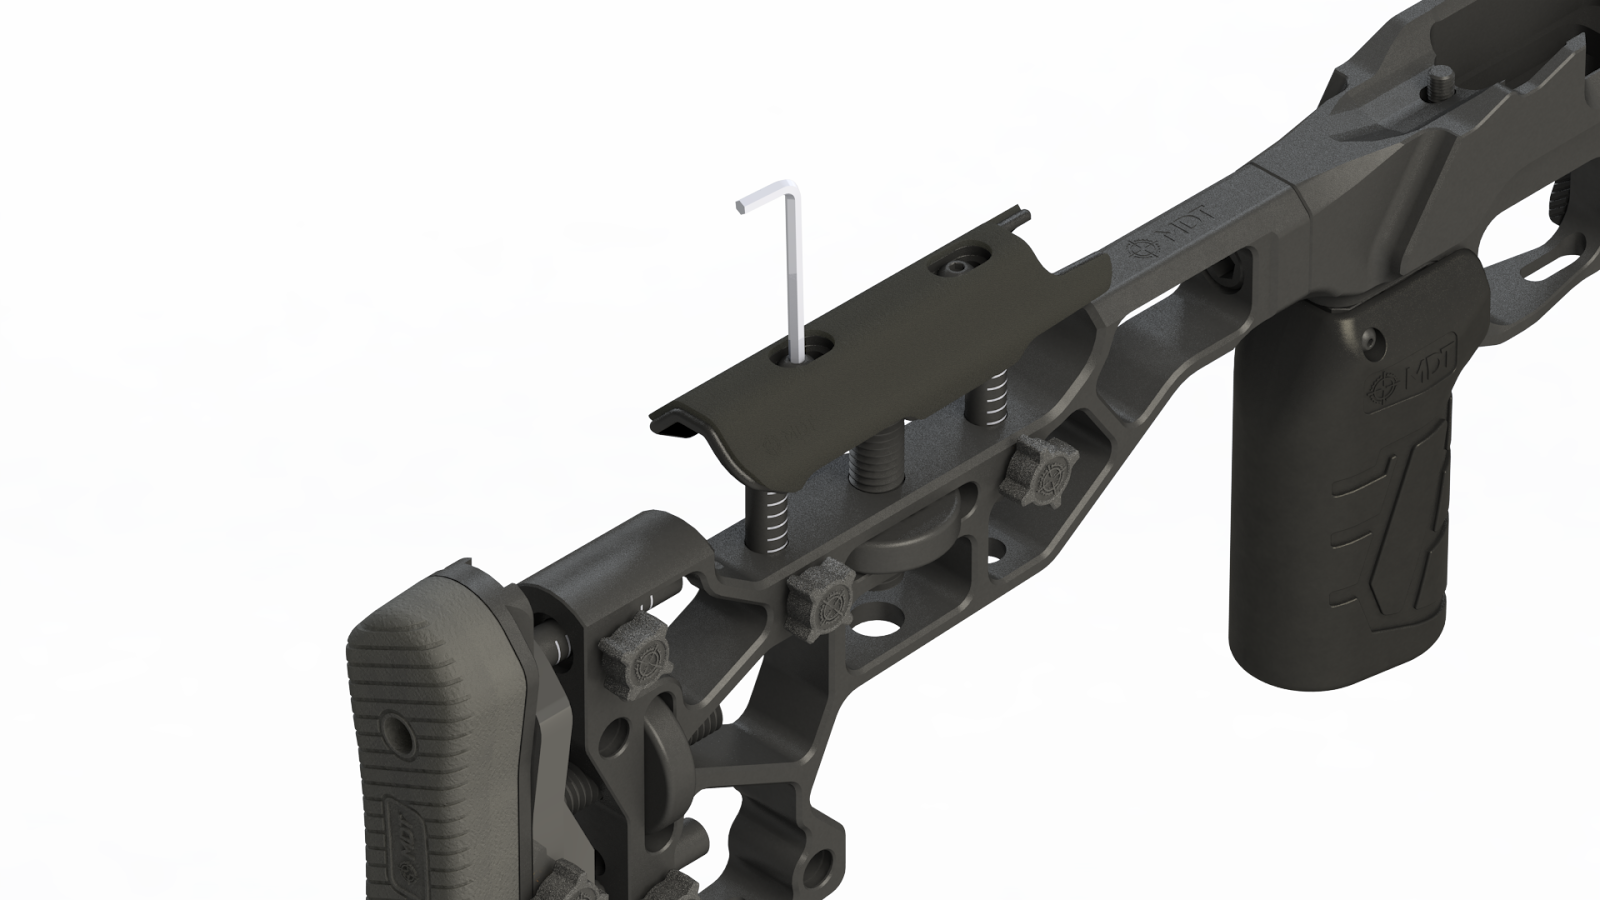
- Repeat the same process with the other #10-32 screw and hex nut.
- Before fully tightening the screws, ensure to align the cheek riser front-to-back and side-to-side on the buttstock. The slots in the cheek riser will allow roughly ½” of front to back adjustment, and the slots in the cheek riser cant plate offer a similar amount side to side.
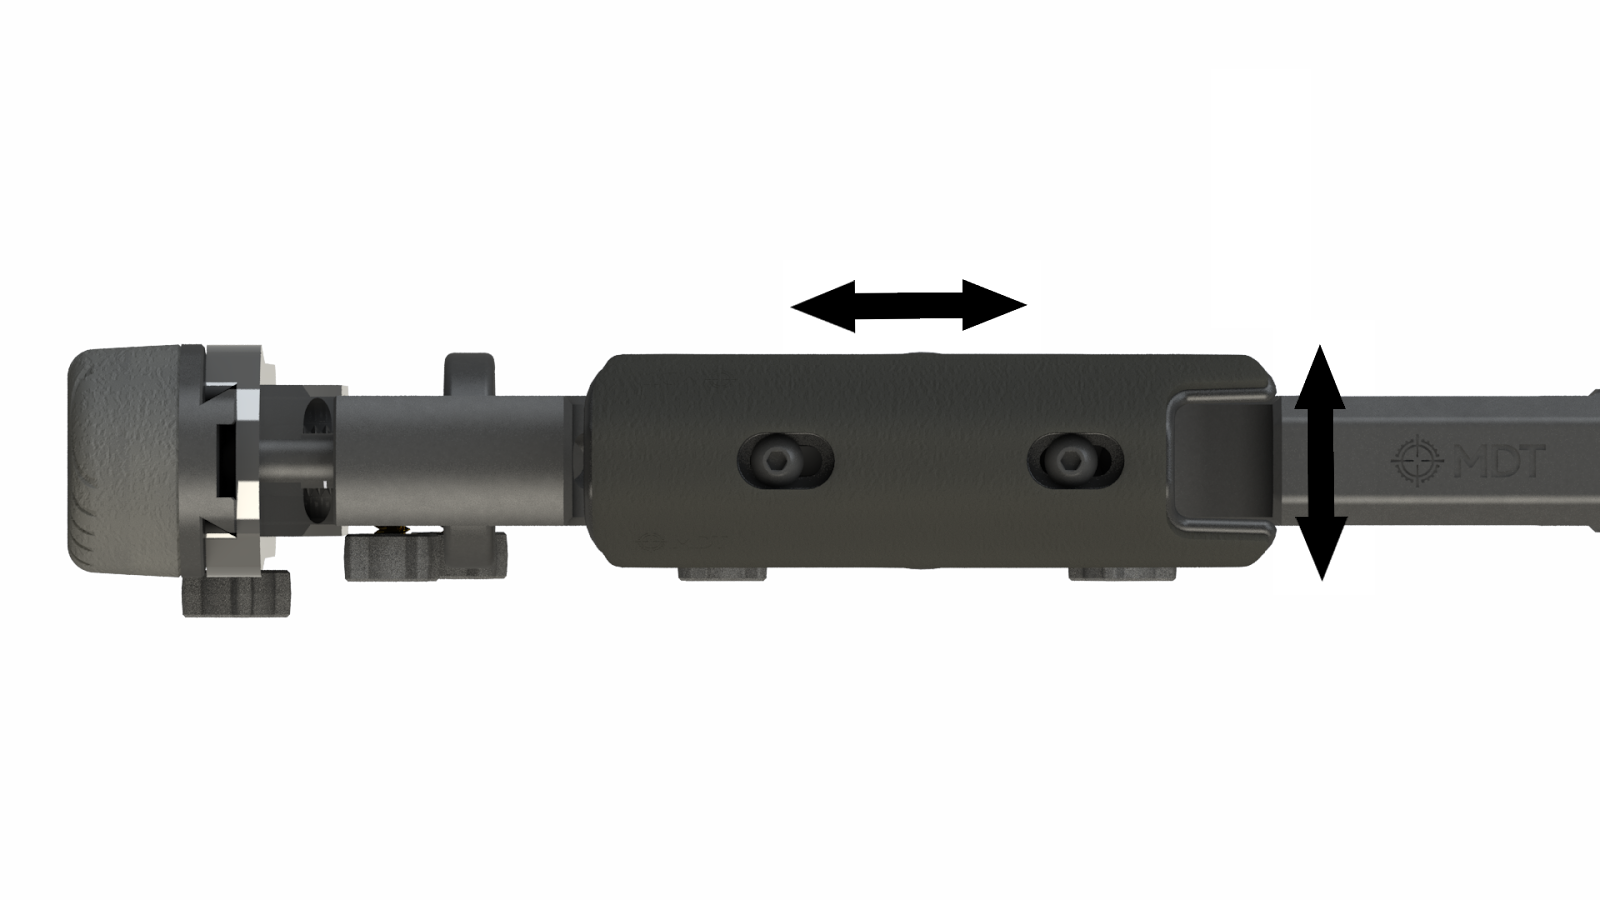
Note: if the cheek riser is set too far forward or rearward in the buttstock cutout, it may contact the buttstock frame and block the machinist from lowering all the way. Check that the cheek riser is able to raise or lower to an adequate position and make adjustments as necessary.
- Once satisfied with the cheek riser position, fully tighten down the #10-32 screw until snug, or approximately 15 in-lb.
WARRANTY What warranty does MDT provide? How do I claim warranty on a MDT product? How MDT process warranty claims? What are the warranty limitations? Jurisdictional Exceptions: SAFETY GUIDELINES 1. ALWAYS KEEP THE MUZZLE POINTED IN A SAFE DIRECTION. 2. DO NOT RELY ON ANY MECHANICAL SAFETY. 3. UNDERSTAND THE TARGET AND WHAT IS BEYOND THE TARGET. 4. NEVER SHOOT AT WATER OR AT A HARD SURFACE. 5. USE PROPER AMMUNITION. 6. IF THE FIREARM FAILS TO FIRE, DO NOT MOVE. 7. ALWAYS WEAR EYE AND EAR PROTECTION WHEN SHOOTING. 8. VERIFY THAT ACTION AND BARREL ARE CLEAR BEFORE SHOOTING. 9. LEARN THE PARTICULAR CHARACTERISTICS OF EACH FIREARM. 10. SHOOT SOBER! DISCLAIMER
